
Check out this 2025 guide on how to care for your dog grooming clippers.
Clipping your dog’s coat is not the most complicated thing in the world. Once you have acquired a high-quality clipper, you will only need some practice.
However, many people do not know what to do next after a serious investment to use their tool for a long time.
Don’t worry; you’re in the best place here.
Thanks to my many years of experience, I have gathered all the information you may need for the best possible dog clipper care.
In this step-by-step guide, you can learn about the basics involved in both dog clipper care and blade care.
Let’s get started!
Choosing the right dog clipper is the first step
Many people have human hair clippers at home. So it would be obvious to use the same tool on our dog, right?
Well, the answer is a huge NO! Many inexperienced pet parents think about this but don’t make the same mistake.
Dogs’ hair is thicker than humans’, and human clippers cannot handle this thickness. The result is full of irritations that are difficult to tolerate for canines’ sensitive skin.
So if you want to do your dog grooming yourself, buy a dog clipper for home. These tools are designed to suit the specifics of your dog.
Of course, it is important to pay attention to quality. There are plenty of brands out there, and you need a clipper that is not only effective but usable in the long run. Of course, you need to consider your dog’s breed and coat type.
The best clipper brands make grooming tools that are reliable and versatile, and durable.
Of course, this quality can also be seen in their price tag. But believe me, buying a dog clipper is a serious investment that has many benefits in the long run.
That’s why you should choose from a selection of popular and trusted brands. Examples include Andis, Wahl, and Oster.
If you buy products from these companies, care and maintenance will also be more accessible, and you can be sure that you have not spent so much money unnecessarily.
When choosing the best dog clipper, you should consider your dog’s breed. But your dog’s individual needs also matter a lot. For example, if you have an extra anxious pup, you may want to get a silent dog clipper.
Choosing suitable blades is also important. By this, I mean the material and the blade size. Different blade size charts can help with this.
Proper dog clipper care: clipper and blades
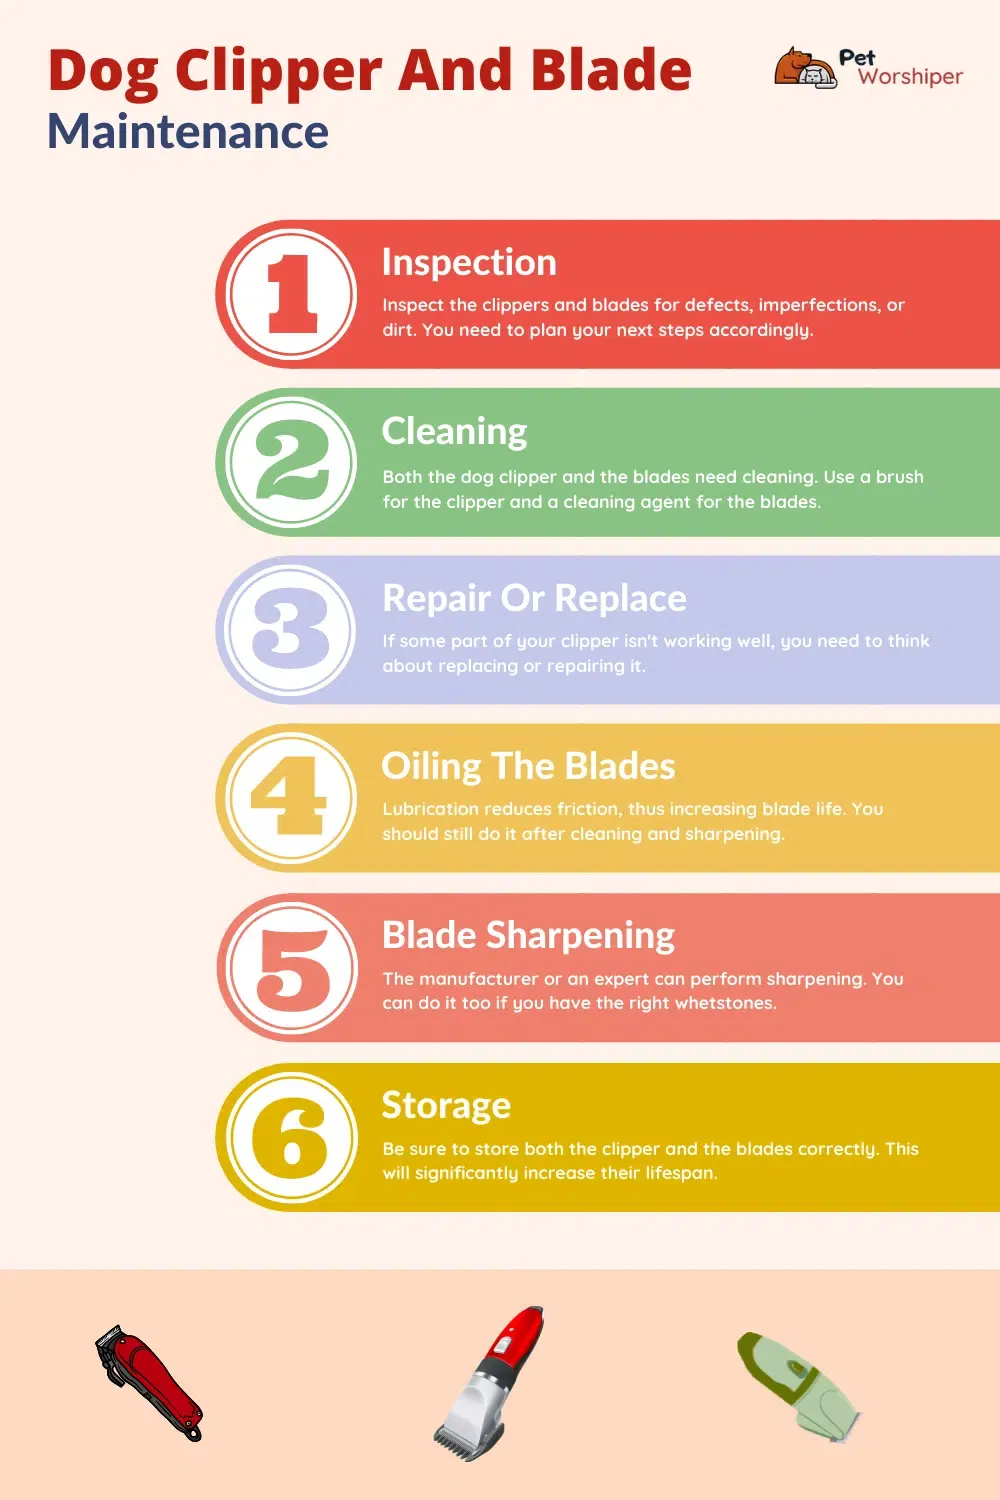
I can’t stress enough the importance of clipper care. There are two parts to this activity. One is to inspect, clean, and repair or replace parts of the clipper. The other is cleaning, sharpening, and oiling the blades.
Each step is vital and can help you use your dog clipper smoothly for many years to come.
Dog clipper maintenance
When we talk about taking care of dog clippers, most people think of cleaning, oiling, and sharpening their blades. A professional high-quality dog clipper can operate reliably for years without special attention.
However, it doesn’t hurt to know about some care tips that can further extend the life of these products.
Moreover, I recommend cleaning your clipper regularly, as, over time, dog hair and other things may build up in it after grooming sessions.
- Inspection: Before carefully cleaning and possibly repairing, I want you to examine your dog clipper. Do you see any damage to it? Is the housing in good condition? Does the power button work well? Also, check the cord. Are there any cuts, nicks, or any injuries on it? Cable issues have a detrimental effect on the operation of the clipper and endanger the safety of you and your dog. Remember: if you have a wireless clipper, you need to check its charger.
Frequency: You don’t have to scan your clipper so thoroughly before every grooming task. However, it is worth checking its condition every 1-2 months in case of frequent use. - Cleaning: Many people forget about the hair stuck in the clipper’s vent. Yet this phenomenon can cause clogging, performance degradation, and the destruction of your tool in the long run. You can use a toothbrush or a specially designed clipper brush to remove accumulated hair. Be sure to unplug the clipper before cleaning.
Frequency: Depending on the quality of the product and the blades, the frequency you need to clean your dog clipper may vary. With frequent use, I remove the hair from the vent every week to avoid clogging. - Repair or replace parts (if necessary): If you find any errors or deficiencies in your clipper during the initial inspection, it’s time to fix them. Check the manufacturer’s or retailer’s website to see if they sell replacement parts. Repairing a cord can be tricky; if you are unsure, seek an expert. A faulty fixed cable is just as dangerous as a malfunctioning one. Other parts of the clipper may need to be replaced. Examples are blade drive, hinge, and lock. Check these parts for wear, rust, and proper function. You will need to replace the blade latch if you notice that the blades are too loose. Check the engine carbon brushes. They are located at the bottom of the clipper housing. You will see if these brushes are too worn out, and you may want to replace them.
Frequency: Of course, you will need to replace the clipper parts mentioned above if you notice anything wrong. Good quality grooming tools usually do not require replacement for years. - Storage: Your high-quality dog clipper is worth storing in a durable case. You have to pay close attention to the cord as it is one of the most vulnerable parts of this grooming tool. Many people simply wrap it around the clipper. Nevertheless, coiling is a better method.
Frequency: Of course, make sure your pet clipper is stored correctly after each use.
Dog clipper blade maintenance
Since blades are the most heavily used, you need to deal with them first, which is essential for clipper care. You will need to sharpen, clean, and oil your blades from time to time, even if you have a heavy-duty dog clipper with a high-quality edge.
- Examining: If your clipper has a detachable blade, take it off. Look for dirt, wear, rust, and inspect the condition of your teeth.
Frequency: You may want to complete this step before or after each grooming session. - Cleaning: Clipper blade cleaning aims to get rid of deposits and dirt that reduce efficiency and longevity. The various impurities increase the friction, which can clearly lead to a deterioration in quality. The procedure is essential as high-quality blades are not cheap. We have to take care of them. Don’t worry; cleaning is effortless:
-Remove the blades from the dog clipper
-You will then need to get rid of any hair stuck to the blade during the grooming session. You can use a toothbrush or any bristle brush for this. You can also use compressed air.
-Find a small bowl or another kind of container in which to put some cleaning solution. Bigger brands sell such cleaners, so you might want to take a look at their offerings. For me, Andis Cool Care Plus worked best. This product also disinfects the blades, which is vital so that your pup does not accidentally get any skin irritation or skin infection. Read the instructions for the solution you are using, as some dilution may be required.
-Depending on the degree of soiling, how long you dip the clipper blade into the cleaning solution may vary. For more severe dirt, this can take up to several hours. Some people don’t take the edge off the clipper but dip it in the blade wash and turn on the tool. In some cases, this method may be enough to get rid of the deposited dirt.
-You do not need to wash the dog clipper blade with water but be sure to wipe it dry with a cloth or towel.
Frequency: I clean my blades after every grooming session. I suggest the same to you. - Oiling: The clear purpose of lubrication is to prevent excessive friction. This way, the blades will heat up less, become dull, and not cause clipper irritations. In addition, lubrication can prevent the edges from rusting corroding and help your clipper slide more quickly on your dog’s fur. Skipping this step can significantly shorten the life of your blade and clipper.
Oiling is not complicated at all. Just apply a few drops of a good quality clipper oil between the blades. Be careful not to use too much oil to avoid sticking excessive pet hair to your tool. It’s a great idea to turn on the clipper after placing the oil droplets to distribute the liquid evenly. You need to wipe off the excess with a cloth or towel.
Frequency: You should use clipper blade oil after each grooming session and cleansing. You may even need more oiling during longer sessions, especially if your dog has a thick fur coat. - Sharpening: they can pull on your dog’s fur. You may want to check out what options manufacturers offer for sharpening. If you’re a DIY person, too, check out my guide to dog clipper blade sharpening.
Frequency: A high-quality blade will last for years without sharpening when used regularly at home. If you are a groomer, you may need blade sharpening up to several times a year. - Storage: A well-chosen blade box or blade case will help with organization and protection.
Frequency: make sure your blades are stored correctly after each use.
Further tips on dog clipper care
The steps above can help you take care of your well-chosen grooming tool. Here are some more tips:
Have other clippers
No matter how careful you are, accidents can happen at any time. It doesn’t hurt to have a spare clipper so you can resume your grooming session immediately if your old one stops working for some reason.
Change blades
Steel blades conduct heat very well, so they heat up sooner. In this case, you may want to replace it. So-called cooling sprays can also help, but you can also choose blades made of other materials, such as ceramic.
Read the instructions
The product instructions provided by the manufacturer usually contain a wealth of helpful information on use and care. Please do not be lazy and read these instructions.
Final Words
As you could see, caring for blades is at least as necessary as caring for the clipper. It all starts with choosing good-quality grooming tools, but then you still have a long way to go.
Following the tips in my article will take you many steps closer to using your dog clipper for a long time.